
How to trim art to the bleed in adobe illustrator
Here you will find everything you need to make sure your art is trimmed to the bleed in Adobe Illustrator. Let’s get started.
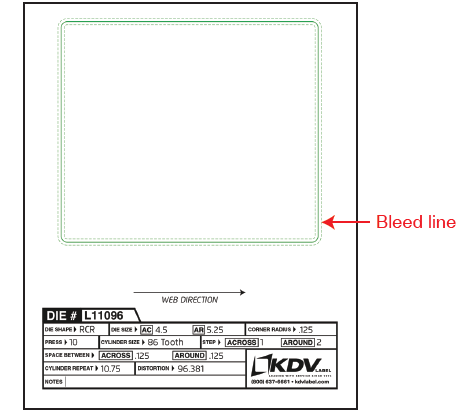
1. sample document
Locate the bleed line from the sample document.
2. Select Bleed line
Select the bleed line. Navigate to “Document Setup” Window. Click “edit artboards”.

3. select “fit to selected art”
In the Preset drop-down menu, select “Fit to Selected Art”

4. Enter Correct Width and Height
Ensure width and height reflect accurate bleed dimensions. If not, slightly adjust them to be exact.

5. Exporting PDFS
If using Esko, navigate to File- Export- Export As. Then adjust Format to “Esko PDF”


If Esko is not available, navigate to File- Save As- Adjust Format to “Adobe PDF”- Navigate to “Marks and Bleeds” and ensure “Use Document Bleed Settings” is checked.


a closer look at the process
Click HERE or the button below to access a PDF version of these instructions!